🚀 Superpowered reading lists in Notion
Fetch all of the relevant metadata in seconds so you can focus on what
matters most.
⚠️ If you set up this script before September 3rd 2022, the book cover functionality
may be broken due to an update from Notion's end. Explanation and fix.
It looks like you've used this guide before. We've pre-populated the
input field with your previous entry.
Click here to skip to the interactive part of this
guide. Or, click here to erase
stored settings.
Notion is one of the best places for organizing and storing your data.
But when it comes to actually collecting that data, some areas of the
product are lacking. In this article, you'll learn how to host your own
autofiller for your Notion reading lists. Here's a preview of the final
product.
Part I: Setting up your database
First, you'll need to duplicate
this
database template to your own Notion. This is done via the 'Duplicate'
button in the top right.
Once you're done, make a note of the database ID. It's the 32
character random string that comes after
https://www.notion.so/<username>/ in the URL.
You can also change styles and add new properties to your liking.
⚠️ Important - Please do not alter the following properties:
"Title", "Description", "Author(s)", "Rating", "Genre(s)", "Link" and
"Pages". The program uses these to identify the columns in which data
should be inserted. Don't change the name of the properties nor their
type.
Part II: Creating a Notion integration
Navigate to
https://www.notion.so/my-integrations
and click on the 'New integration' button.
Fill in whatever identifying information you like, then submit the form.
Copy the 'Internal Integration Token' that's on this page.
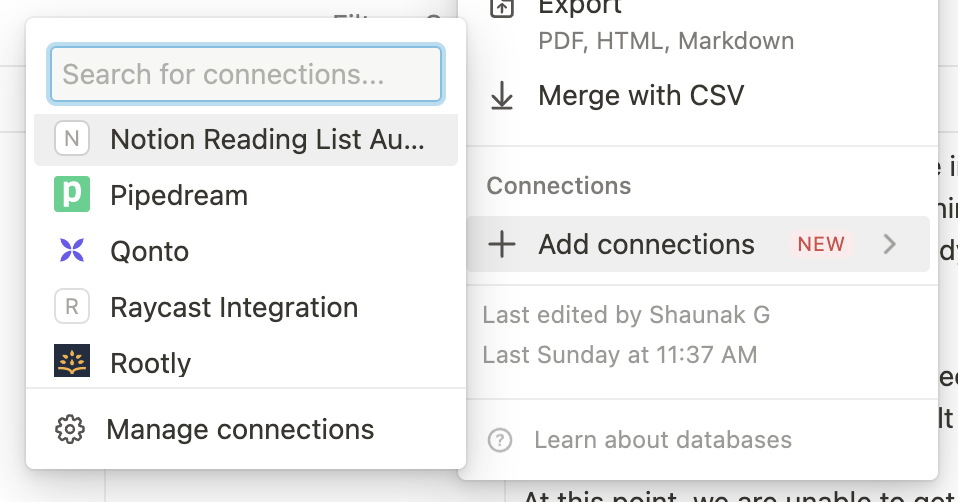
Go back to the database you created and add a new connection to your integration.
Click the options menu then 'Add connections', and search for whatever you named
your integration. Click 'Confirm' and you're done!
Part III: Setting up the web server
We're going to use Repl.it to host our
web server. You'll need to create an account if you don't have one
already - but it's free and lasts forever.
Head over to the
Repl.it page
for the reading list server template. Then, if needed, sign up or log in to Replit. You
should eventually arrive at a page like the below.
We're almost done - we just need to fill in a few things. Click the lock
on the menu at the left to navigate to the 'Secrets' view.
Secret 1: For the key, type in DATABASE_ID. For the secret,
paste in the database ID you took a note of earlier. Then, press 'Add
new secret'.
Secret 2: For the key, type in NOTION_API_KEY. For the
secret, paste in the Internal Integration Token you took a note of
earlier. Then, press 'Add new secret'.
Press the green 'Run' button at the top and wait 30 seconds for a white
window to pop up with a URL and some text. Copy that URL, it should look
like https://notion-reading-list.username.repl.co/.
Paste the URL below in the input box and click 'Go'. While this
page and the Repl.it is open, we will query your database every 5
seconds. Also, it'll be saved in your browser's local storage.
Part IV: Activating the program
Once you paste in the server URL and press 'Go', any page you create in
the database that ends with a semicolon will have metadata
fetched for it.
🌟 Bonus section: Automating this process, forever
You can use an external service to ping your server every minute or so
in order to keep it up to date. In this section, we'll guide you on how
to do just that.
First, you'll need to create an account on
cron-job.org.
Once you've done that, you'll see a console. Click 'Create cronjob' on
the right of the page.
You can name the job whatever you'd like. For the URL, type in
https://[YOUR REPLIT SERVER URL]/fetch. That
is, the server URL that you'd paste in the input box above, appended
with /fetch.
Set the frequency to every 1 minute, then, click 'Create'.
All done! You can check if it works by using your reading list normally
and checking if it updates.
⚠️ Notion API update (3rd September 2022)
Unfortunately, Notion changed their API (the protocol that allows this program
to interact with Notion) in a way that breaks the book cover functionality of this
script. If you setup your repl.it instance before 3rd September 2021, you will need to
follow the instructions here to get it back.
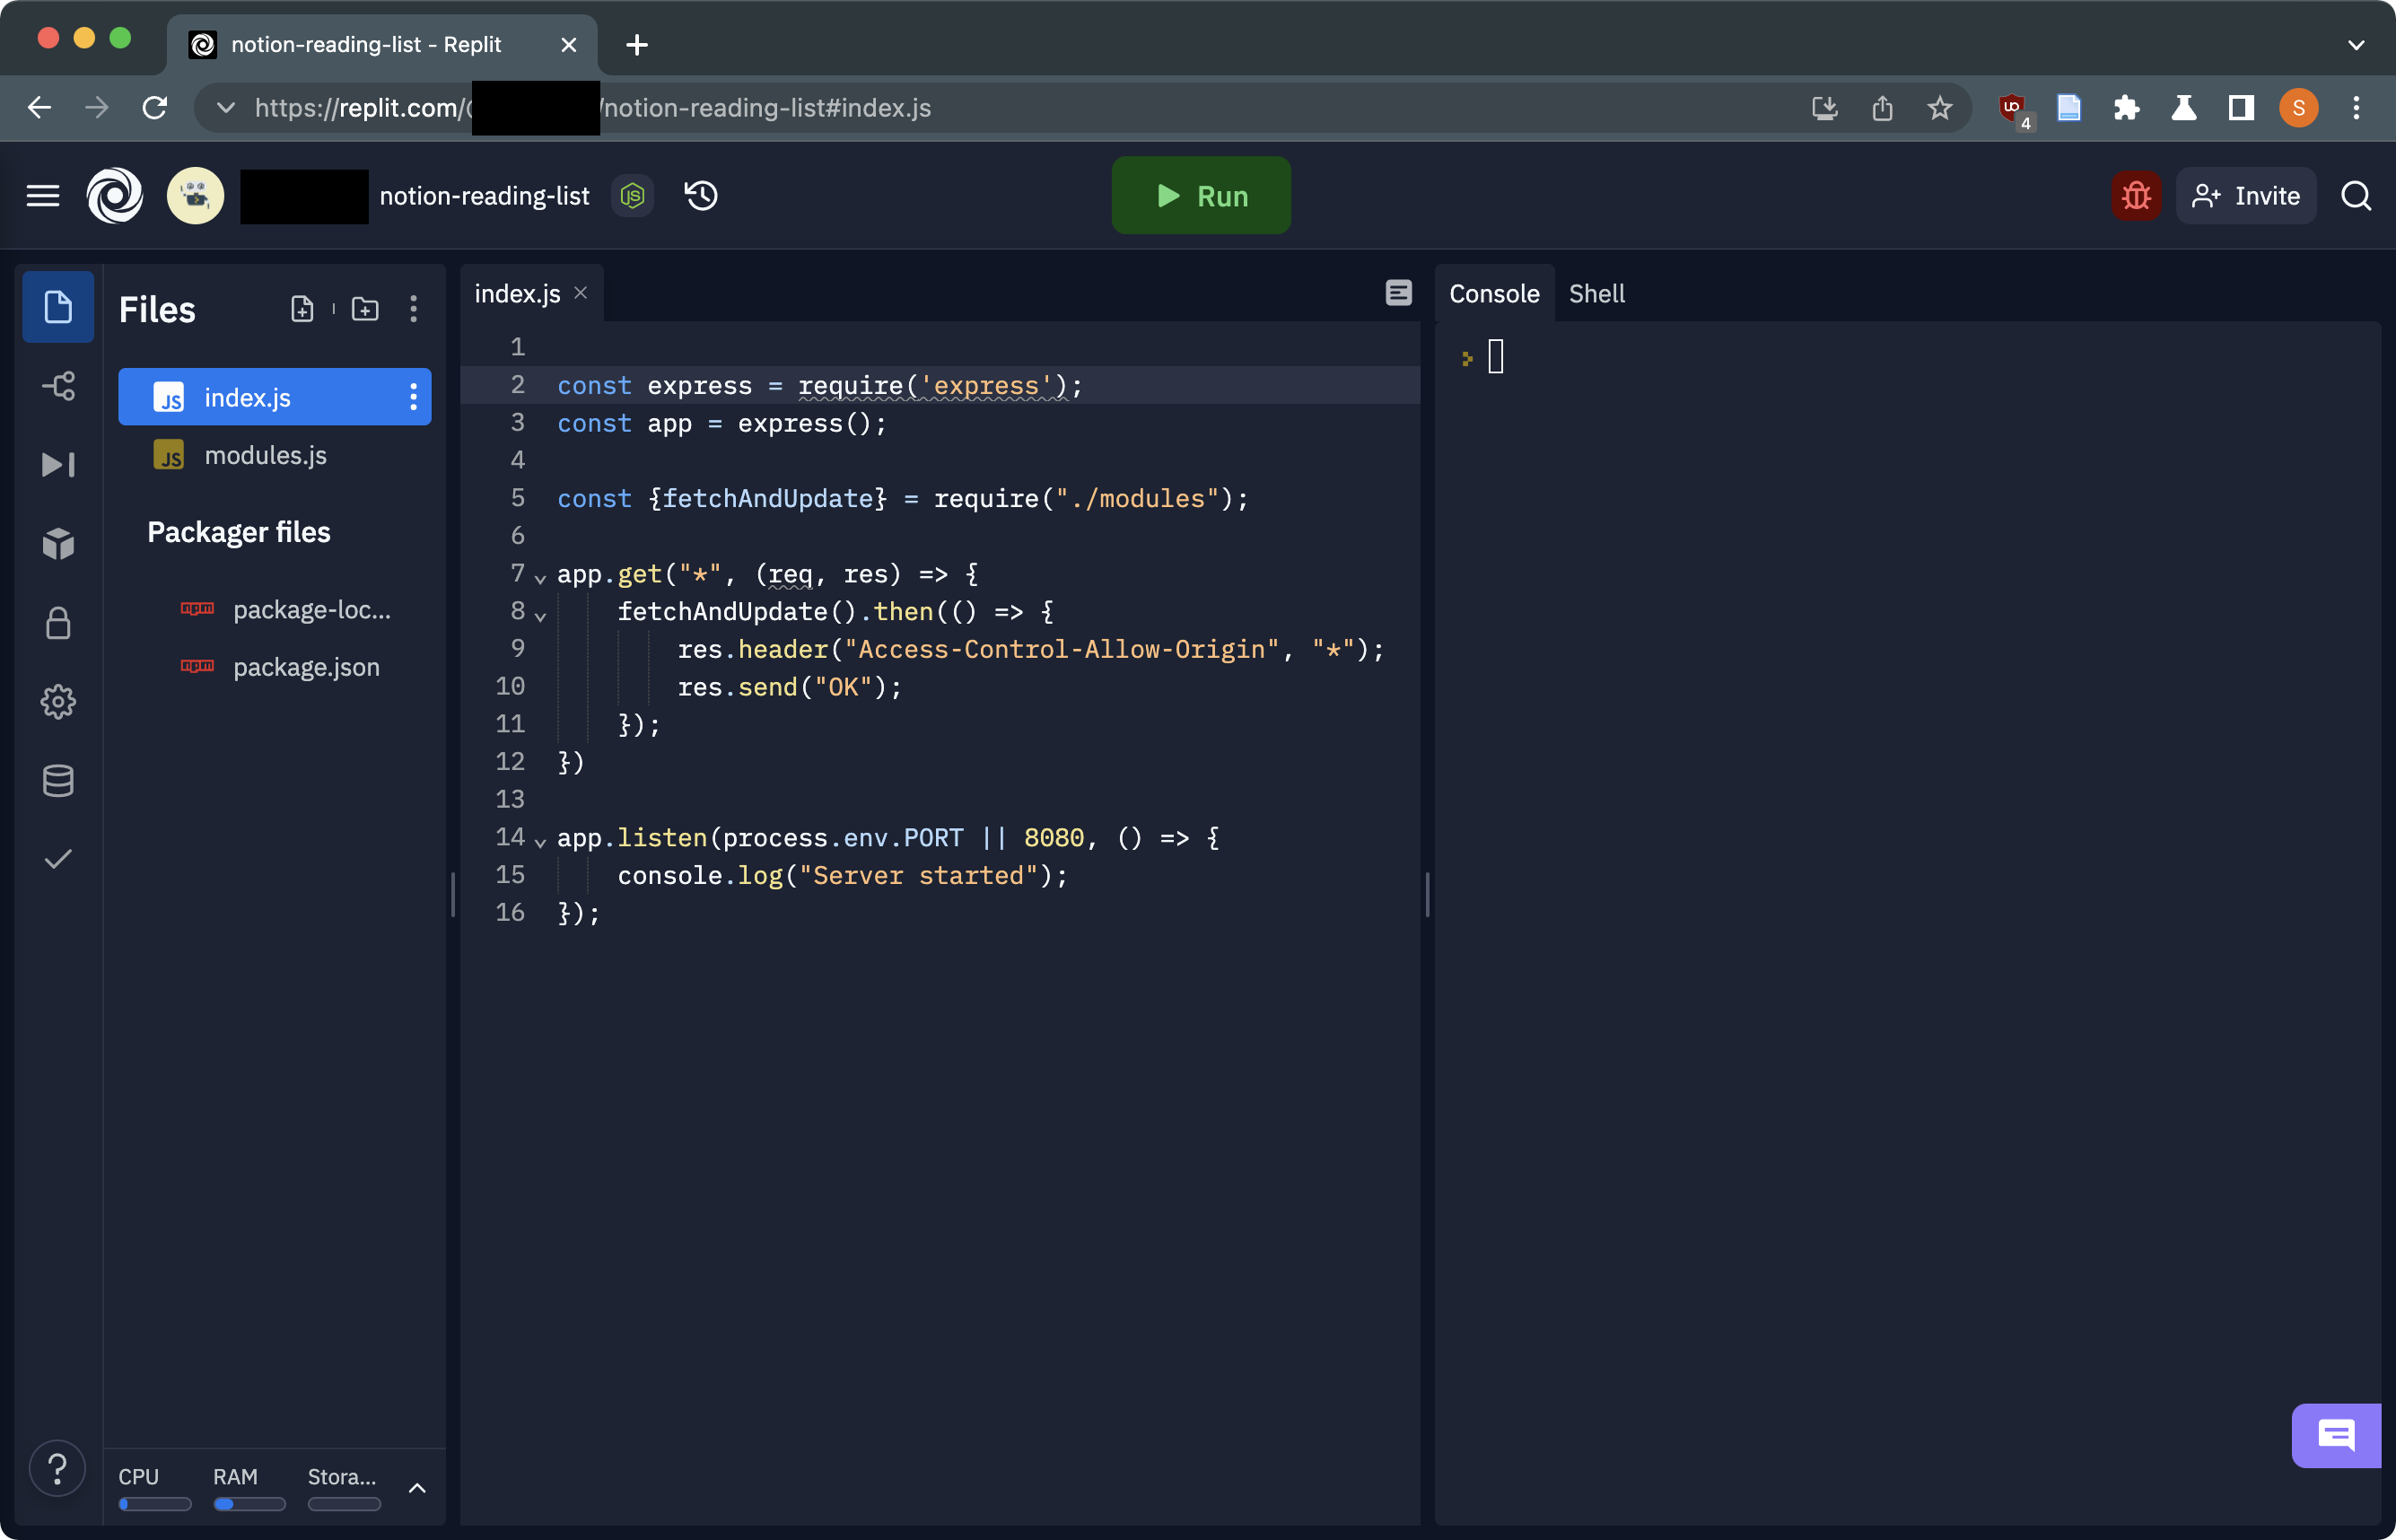
All you need to do is go into your repl.it server
(which should be here based upon your browser's local storage)
and copy this code into the file index.js.
Then, restart your server by pressing the 'Stop' button and then the 'Run' button at the top of the page. You can now
add semicolons to the end of the books you want updated and the covers should show up again.
I do apologise for this inconvenience, however, after this step your server will no longer need any more patches
and will continue to update itself with bugfixes.
🙋♀️ The image proxy and your privacy
Due to a bug on Notion's end, I have had to replace all book cover URLs with a proxy
that will fetch the image from Google Books and add the correct extension. This is because
Notion requires the image URL to end with an extension, but Google Books does not provide one.
The image proxy is hosted on Cloudflare Workers. The only request data available is any errors in the function and
the number of requests. The only thing it does is take a Google Books ID and return
the cover image for that book. It does not store any data about you or your books.
However, if you're still not comfortable with this, you can host your own image proxy.
The code is very short and available here
for anyone to use. You can deploy it to Cloudflare Workers or any other serverless platform.