Chopping my brain into bits

23 Mar 2026 7 minute read
Last year I had a brain MRI done as part of a research study at the University of Melbourne Centre for Brain, Mind and Markets. Afterwards, the researchers sent me the raw scan, which meant I could inspect my own anatomy rather than just read a radiology summary.
Over the past few months I’ve been seeing how far I could push that opportunity: extracting metadata from the original file, running the scan through brain segmentation software, pulling out individual structures, and turning the result into the interactive 3D model at the top. This post is a walkthrough of that pipeline, and of what became legibile from the grayscale slices of my brain.
The raw scan is fascinating but not very helpful
As a medical student, I’ve been taught the basics of interpreting brain MRIs, so opening up the raw scan in a slice viewer was quite underwhelming. It was essentially the same as any other MRI I’ve seen throughout my education.
However, having the scan file itself let me extract a bit more information about how it was made:
Field strength
7 Tesla
Around twice the strength of a hospital scanner.
Sequence
MP2RAGE
This pulse sequence provides good contrast for brain anatomy.
Voxel size
0.75 mm isotropic
A voxel = a 3D pixel.
Grid dimensions
224 × 320 × 320
The raw file is a 3D block rather than a single image.
Total sampled voxels
22.9 million
This includes my skull, eyes and neck.
Approximate field of view
168 × 240 × 240 mm
The physical size of the captured data.
I already knew some of this from looking up the machine they used to scan me 1. However, finding out the scan dimensions was useful because they set the ceiling for everything that follows. If my scan had been particularly low-quality, I wouldn’t have even bothered continuing because no algorithm would be able to clearly separate my brain’s structures.
The most immediate way to inspect the MRI was just to scroll through it in the three standard anatomical planes.
This was the first surreal part of the project - watching slices of my own skull and recognising the big landmarks (the ventricles, the corpus callosum, the cerebellum, the hemispheres). However, at the same time, I was also aware that I was mostly pretending to know what I was looking at. I could tell that there was a lot more information buried in the scan, ready to be analysed.
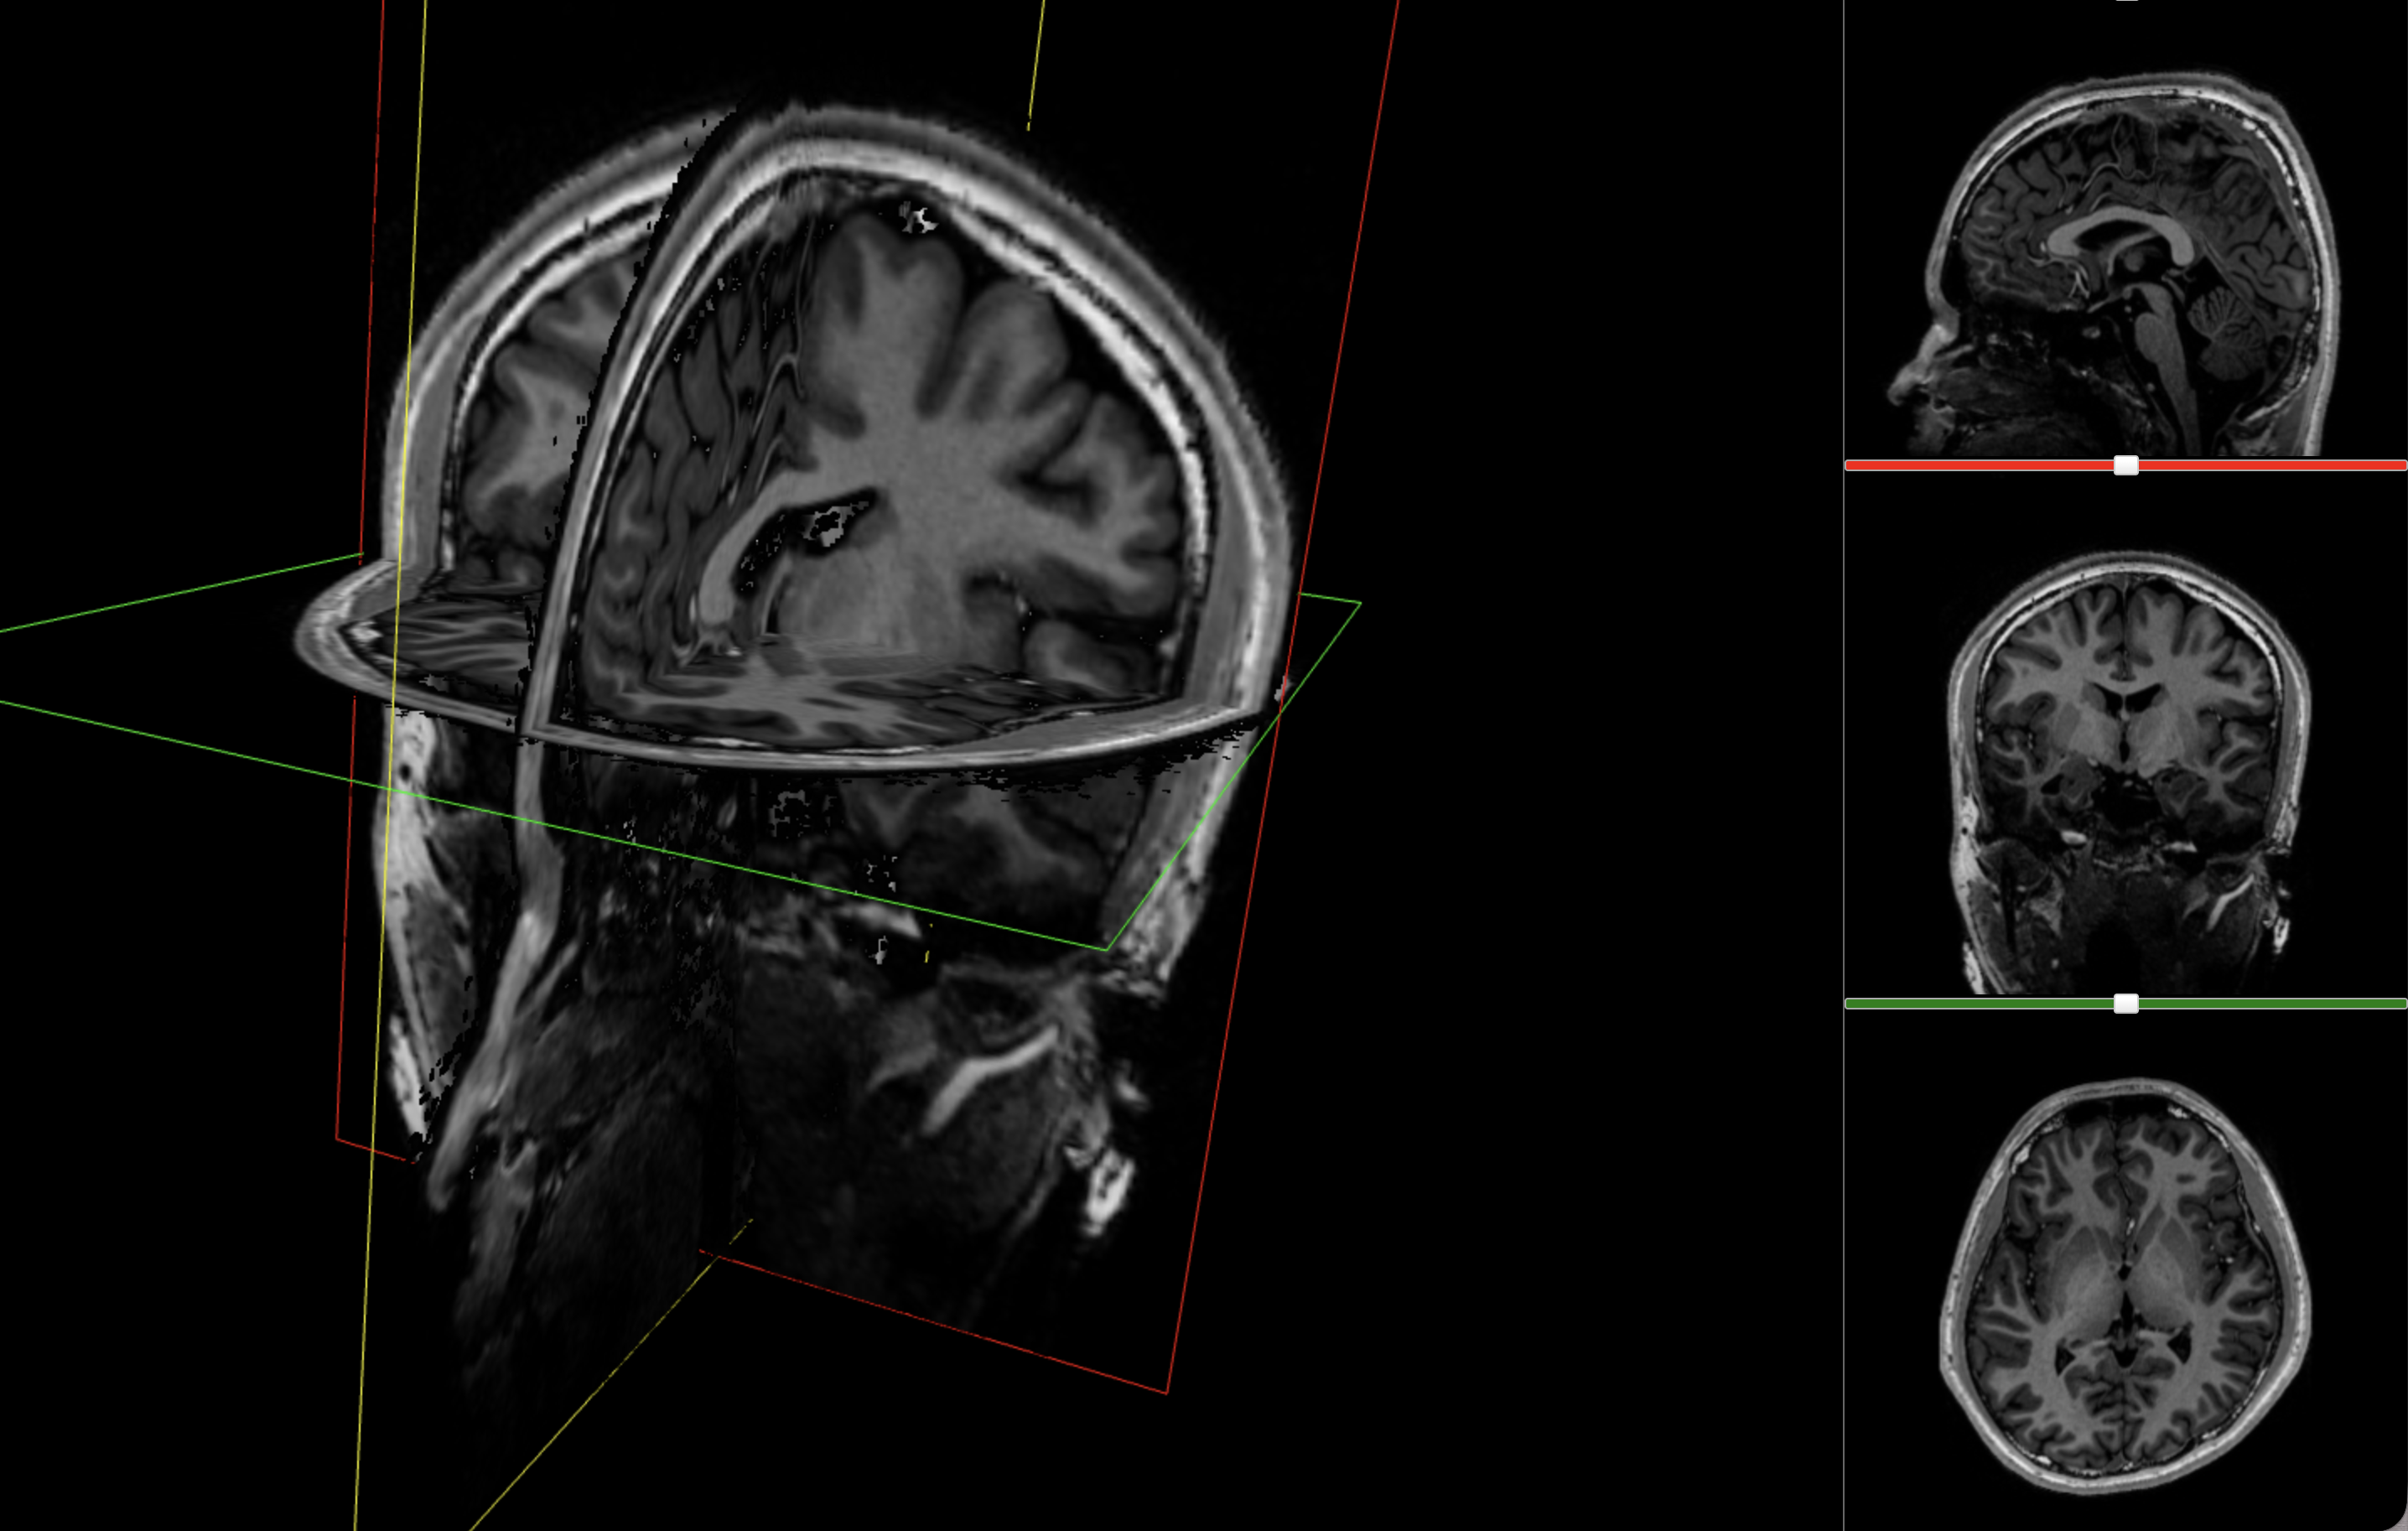
The standard viewer was good for navigating the three orthogonal planes, but it still assumes you already know how to read anatomy from grayscale slices.

Turning voxels into anatomy
The first step was to run the scan through FreeSurfer, which is one of the standard toolkits for cortical reconstruction and anatomical segmentation.2 Essentially, FreeSurfer can take a grayscale set of brain slices and tell you:
- where the cortex is
- where the white matter is
- where the ventricles begin and end
- which deep structures are likely to be thalamus, hippocampus, caudate, amygdala, and so on
Conveniently, FreeSurfer packages this within the one recon-all command, which combines all of the analysis tools into one pipeline.
What did FreeSurfer spend its time on?
It took 12 steps and four hours for the program to essentially:
- Remove my skull, neck and eyes (ouch)
- Align the scan to FreeSurfer’s own anatomical templates and priors
- Estimate where the major tissue boundaries and structures were likely to be, accounting for my individual anatomy 3
By the end of that process, the scan was a detailed, computationally labelled model of my brain, full of named tissues and structures. This became the main anatomical backbone of the project and the one I would eventually use for the 3D model. One surprise was that the software produced not just shapes, but quantities, so I could see objectively how big my brain was.
How much of my brain is cortex, white matter and everything else?
This was one of the first moments where the scan started to feel interpretable, but more work was required before I could intuitively understand how my brain was structured.
Dissecting out structures
After the four-hour analysis, FreeSurfer had already given me what I needed to inspect the scan: a segmented volume that could be overlaid directly on the anatomical MRI. Visualising that (using a tool like ITK-SNAP), I got something a bit more interpretable than the original slices:
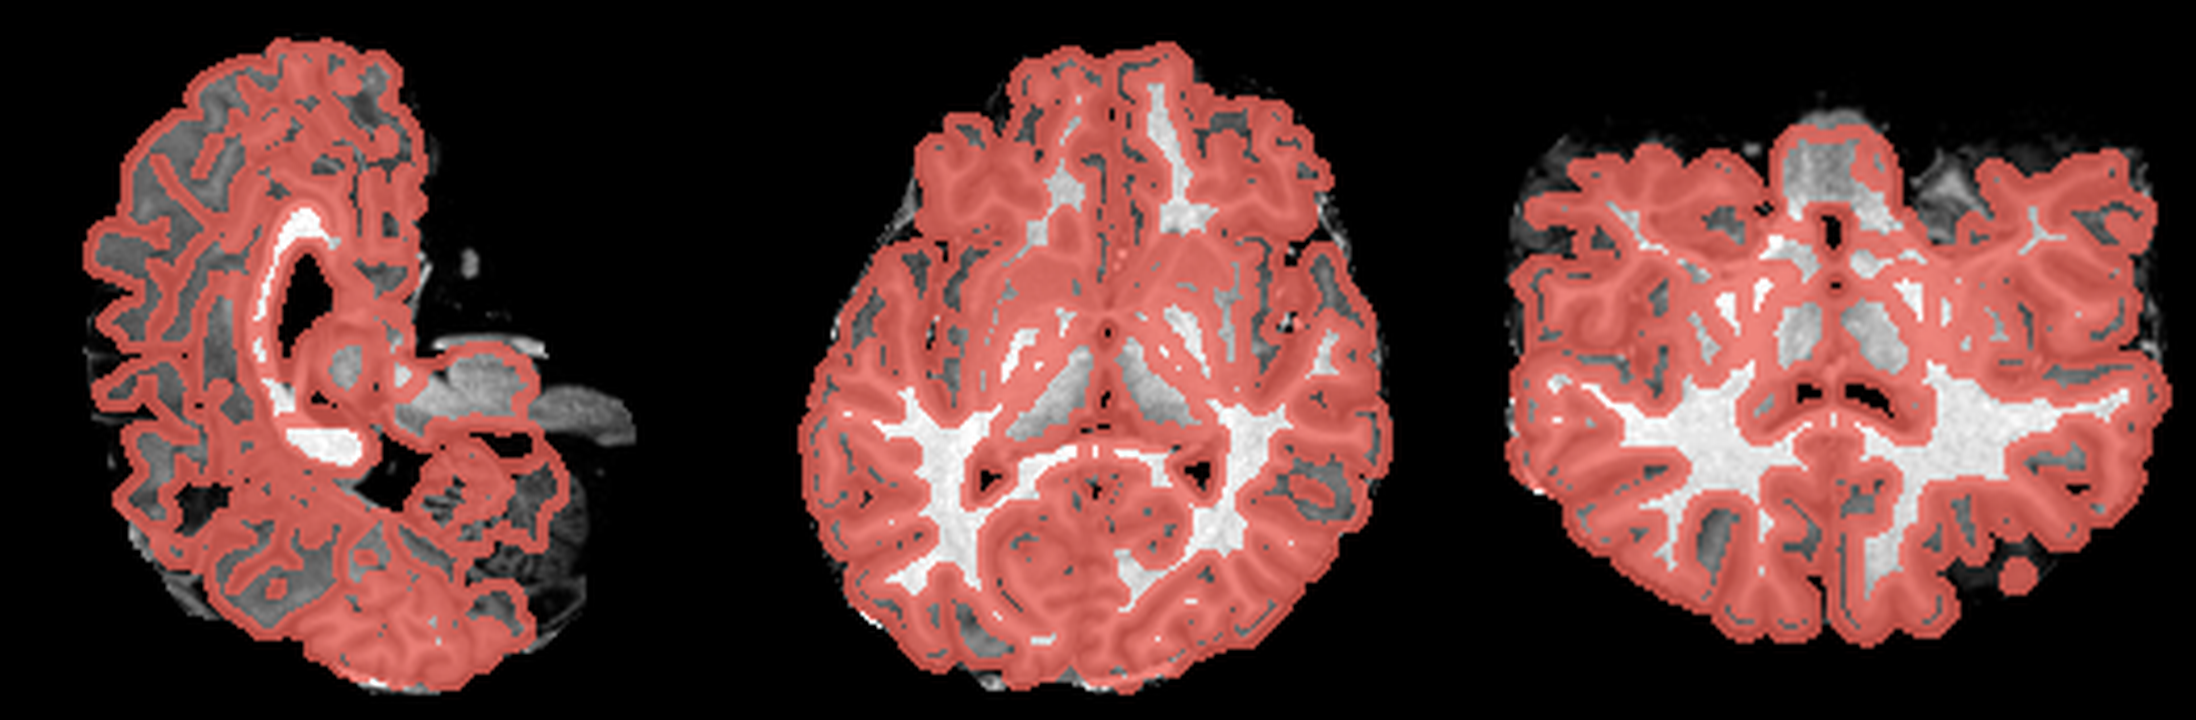
These are three orthogonal slices of my brain, with borders drawn around FreeSurfer’s own segmentations.
What I liked about having this data was that it changed how I interacted with the scan. Instead of staring at individual slices and guessing at the composition, I could start isolating specific parts of the brain.
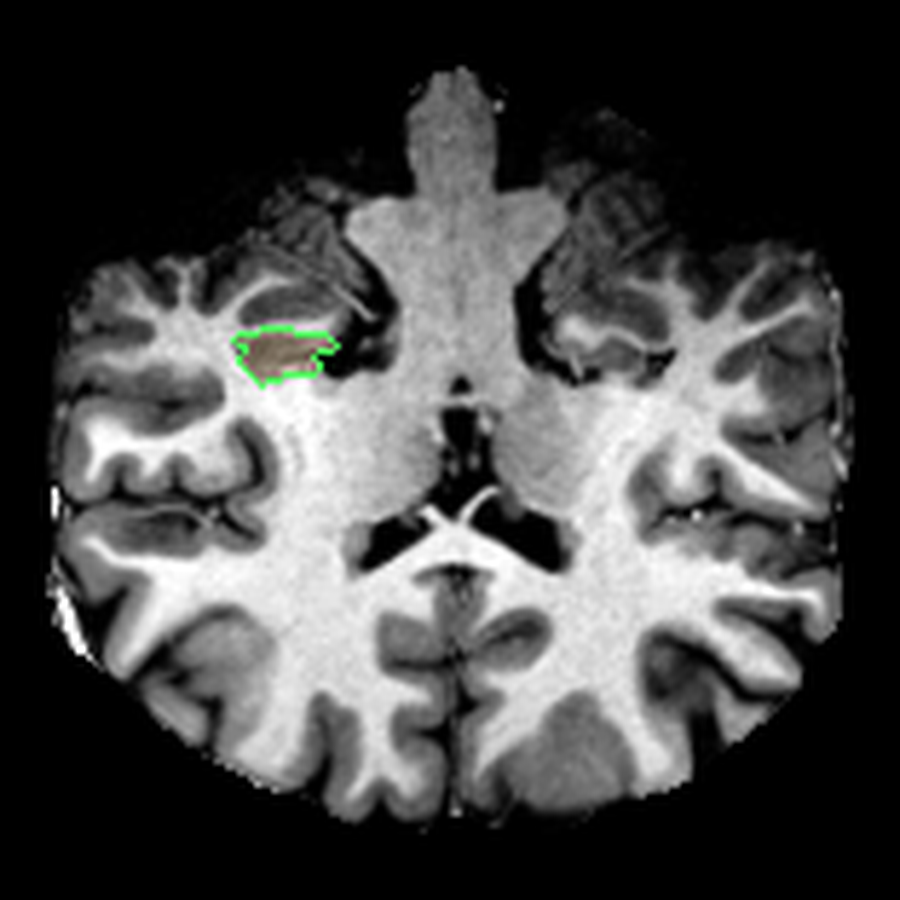
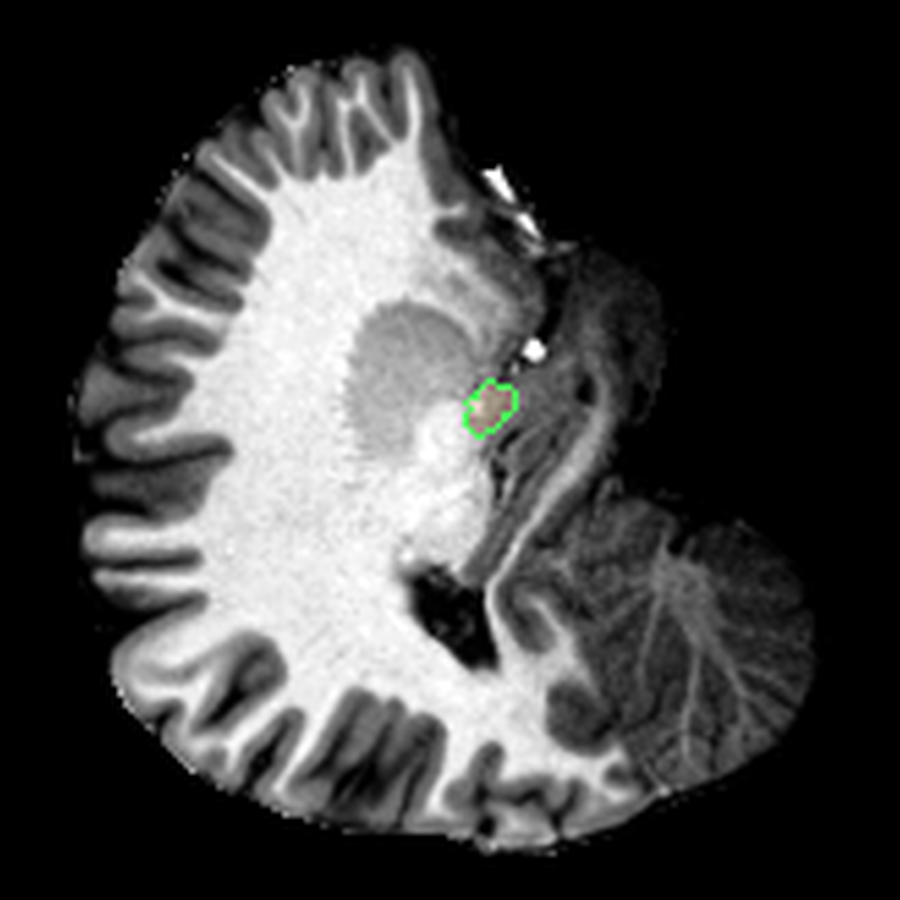
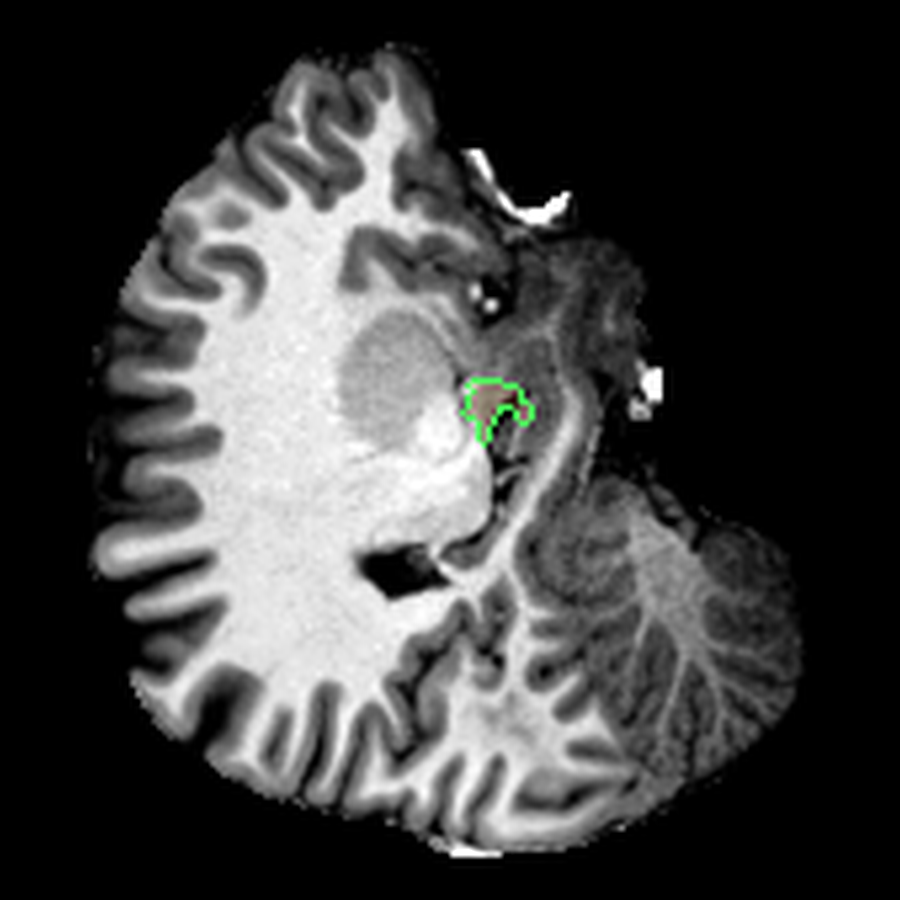
The visualisations above show how little differentiation some brain regions have from their surroundings - I knew roughly where the thalamus was in the brain, but would never have been able to point it out on the MRI. At this stage, FreeSurfer plus some code had given me a perspective that would have been impossible for me to achieve myself.
A quantitative perspective
Once I had labels and volumes, I could also start treating the scan as a source of quantitative data. For example, there was information about the volume of my brain hemispheres:
- left cortex: 262,938 mm³
- right cortex: 257,845 mm³
Those numbers felt pretty plausible. They put the total cortical grey-matter volume in the rough ballpark I would expect for a healthy adult brain, and the small left-right difference is the kind of asymmetry that regularly shows up in normal anatomy (it could also be a segmentation error).
FreeSurfer also measures the cortex in much finer pieces, letting me break down my brain into “cortical parcels”.
Which named cortical regions took up the most space?
Turning anatomy into 3D models
Eventually I started thinking about turning this information into a 3D model. Unfortunately, FreeSurfer doesn’t provide 3D meshes out of the box. I had only:
- Cortical surface files: a map of the pial surface of the brain
- Surface annotations: annotations for the aforementioned cortical map, associating regions with names
- Volumetric segmentations: descriptions of which voxels in the 3D structure of my brain corresponded to which parts
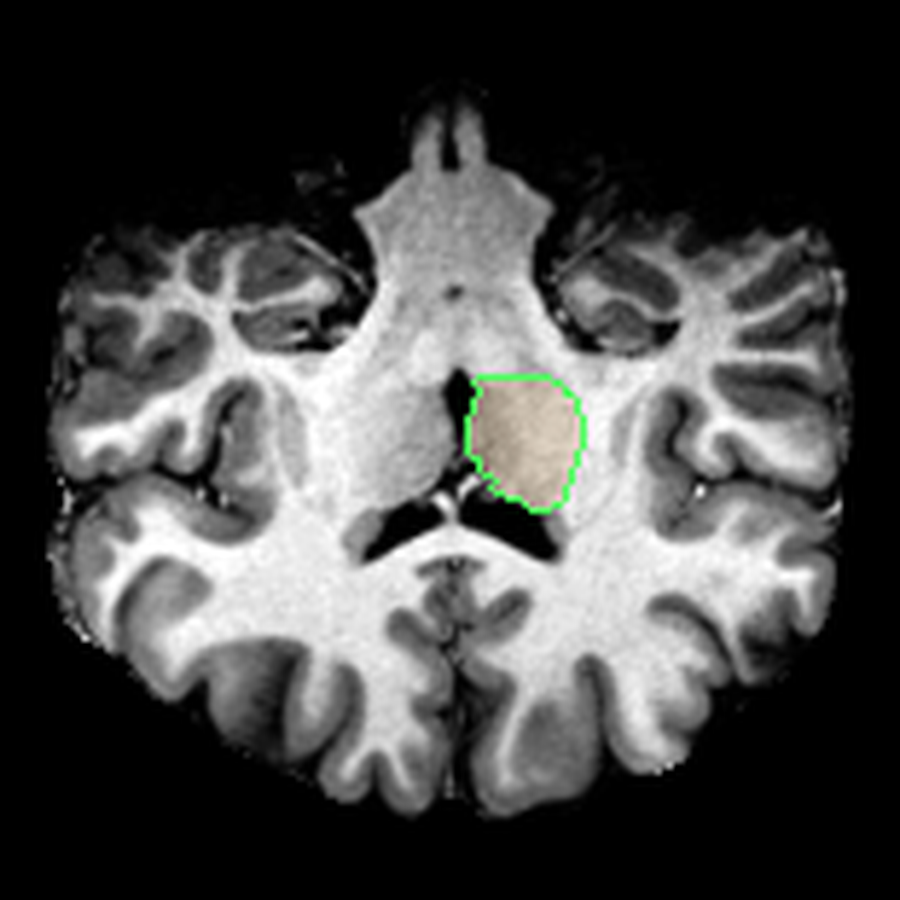
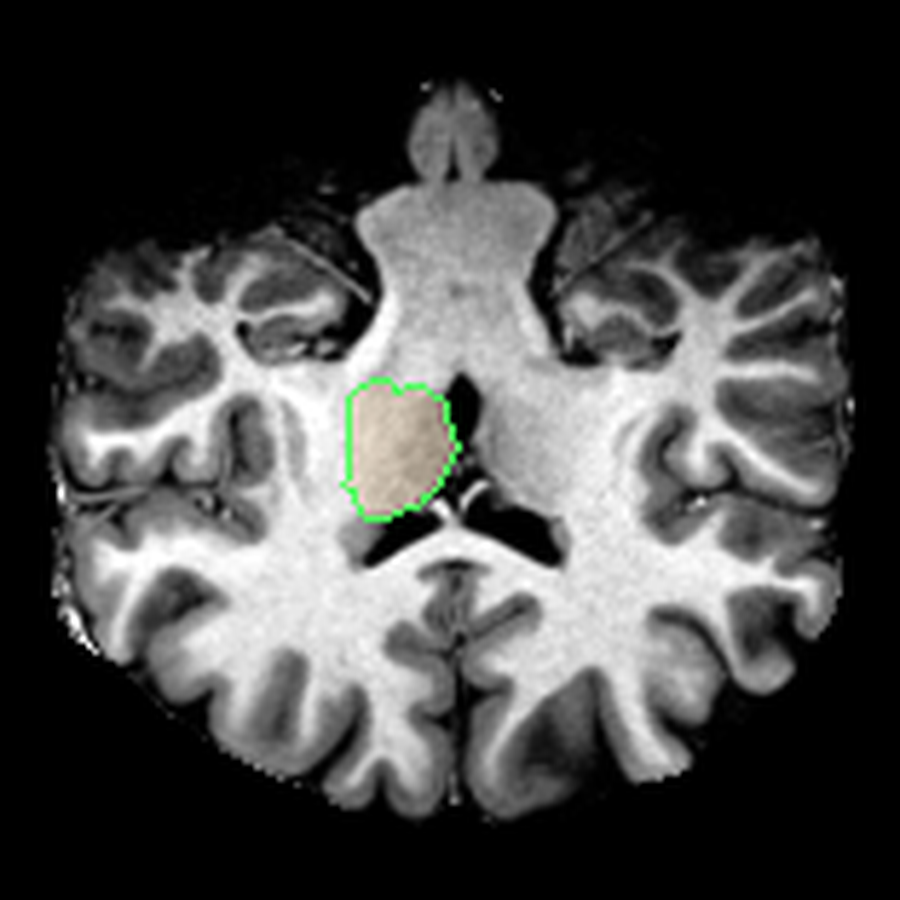
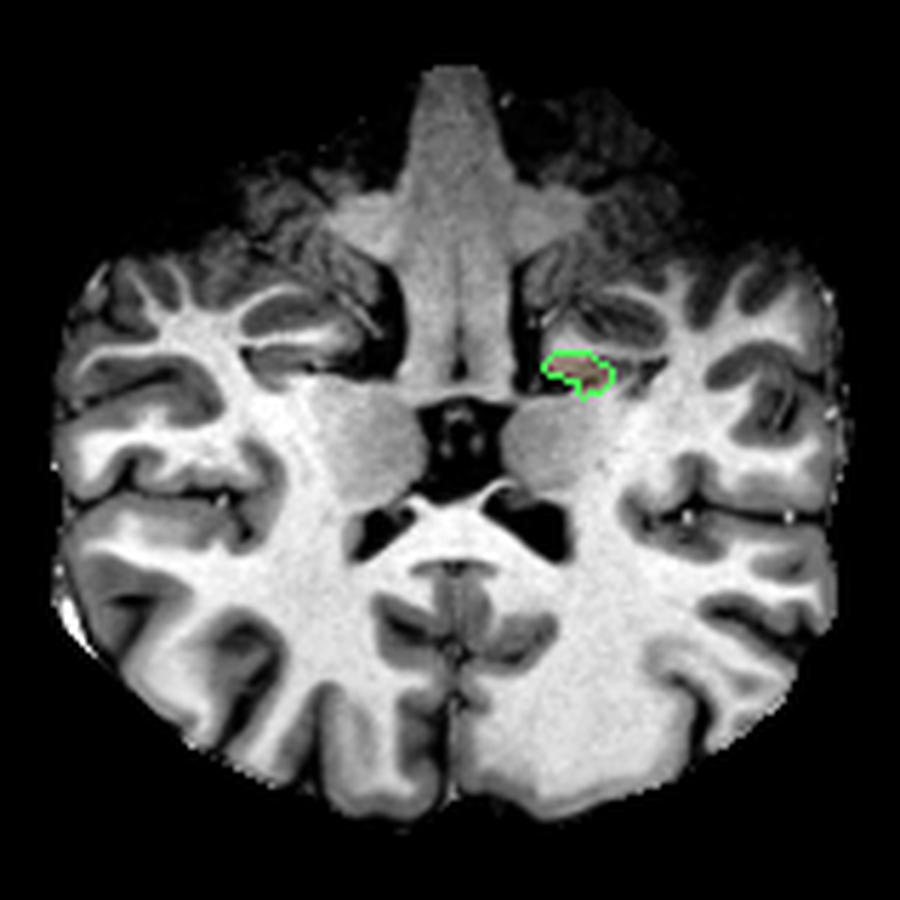
To extract the models, I used the volumetric segmentations, essentially demarcations of where exactly each region was. The strategy was:
- Isolate one label as a binary mask
- Crop to its bounding box
- Run a marching cubes algorithm to create a 3D surface that would fit the label boundaries
This created quite clean 3D models that could be used with Three.js, 3D printing software or any model viewer. The remaining work was mostly pragmatic - I had to reduce the size of the model to ensure it would load quickly on the website. This involved decimation to reduce face count and smoothing to remove faceting (essentially 3D pixelation).
Conclusions
It was really fun mining as much information as I could from my MRI! I think that as medical students, and even as doctors, we become too used to reading reports from radiologists that elide everything except the abnormalities. But objectively, it’s very cool that you can now see inside your own body, something that probably only 1% of humans have been able to do 4. I would definitely recommend exploring your own scans, if only to develop a sense of wonder for medical technology and excitement for the future of medicine.
I was very lucky to receive the raw imaging data here, but in the future, I’ll request it from every imaging centre I visit. Subscribe to my blog if you want to see dissections of my other organs!
Further reading
If you want to follow the same rabbit hole, these were the most useful references:
- NiBabel’s guide to NIfTI images
- FreeSurfer
recon-alldocumentation - FreeSurfer wiki
- FreeSurferColorLUT / segmentation labels
- Three.js
Feel free to reach out if you need any help with this!
Footnotes
-
A Siemens Magnetom 7T Plus Ultra High Field MRI scanner at the Melbourne Brain Centre Imaging Unit, one of two 7 Tesla scanners in Australia. I was very lucky to have a 7T scanner - most hospital MRIs would be around 1.5 T which is about half the detail. ↩
-
The FreeSurfer wiki and especially the
recon-allpage are the key references for understanding what the reconstruction pipeline is actually doing. ↩ -
This uses something called a non-linear transformation. Essentially, the program attempts to find a distortion mesh that will warp one slice of my brain onto a predetermined atlas. The atlas is basically a map of how probable it is for certain structures to be in certain locations. ↩
-
Assuming that ~107 billion humans have ever been born, and ~1.5-2.5 billion MRI studies have been conducted. ↩